
DHCP reservations
A quick guide on DHCP reservations, DHCP in general and even how to configure DHCP reservations on a NETGEAR router.
If you’re in the IT, cyber sec or networking field you will need to know what DHCP is and how to create a DHCP reservation for business-critical devices so their IPs never change. There are a few ways to do this and depending on the device you are using it can be different. The concept is more or less the same across devices. DHCP reservations are not STATIC IPs per say, however they act like it (sort of).
Think of it this way, whenever you book a hotel room you call the hotel and say something along the lines of “Hello my name is SUMO and I would like to book a hotel for a week”. The operator will take down your information and tell you your room number. Your room number doesn’t change during your stay unless something out of the ordinary happens. Think of it that way, when you create DHCP reservations for devices on a network you are taking down their information (MAC address) and saying “Whenever this mac checks into the network assign it this IP (or room number). It’s very common to do this on a network for devices you don’t want changing IPs constantly like printers, APs (access points) or even VOIP phones. (Some would argue setting statics for these are better but it’s all preference) Personally, when configuring printers on a network I like to set up DHCP reservations for them. I will show you how to assign DHCP reservations on a NETGEAR router as an example and I will go into DHCP a little as well.
Also if you like what I do, please consider subscribing! Thank you!!!
DHCP stands for Dynamic Host Configuration protocol. What does it do? Well, whenever a device connects to a network whatever is handling DHCP will automatically assign it an IP address that way the device can communicate on the network. DHCP is also used for things like subnet mask, default gateway and DNS server information on the device. I won’t be covering all of that today just a high-level overview of DHCP and its usefulness. Usually in small businesses and home your router will be the device handling DHCP, in larger networks you might have a server performing that function. A device will connect to the network and ping the router or whatever is handling DHCP for an address so it can get to the internet and traverse the LAN. The most important things to know in my opinion on a basic level is how to set a DHCP scope, a DHCP reservation and what it does automatically. We have already gone over what it does automatically. Let’s cover DHCP scope.
A DHCP scope is whenever a device connects to the network DHCP will assign it an IP within a set IP range that you configure the parameters for. This is done for a few reasons.
1. You have defined an area for devices that don’t normally connect to operate on
2. You will be using certain IP ranges for critical devices and reserving them.
There are some more reasons but that is the gist. I will be making a more comprehensive guide in the future this one is a “to the point” guide on how to assign a reservation. Speaking of, let’s get into that.
If you are new to networking or IT in general purchase your own router and start breaking stuff at home. It’s how you learn. Today’s example I will be showing you how to create a reservation on a NETGEAR router. You will have to navigate to your default gateway. If you do not know your default gateways address
Step 1.
-Open up command line
- Type in “ipconfig” without the quotations and hit enter. You will see a line that says default gateway. It should look something like 192.168.1.1 ( it’s not always these numbers) enter those numbers in a web browser hit enter and log into your router.
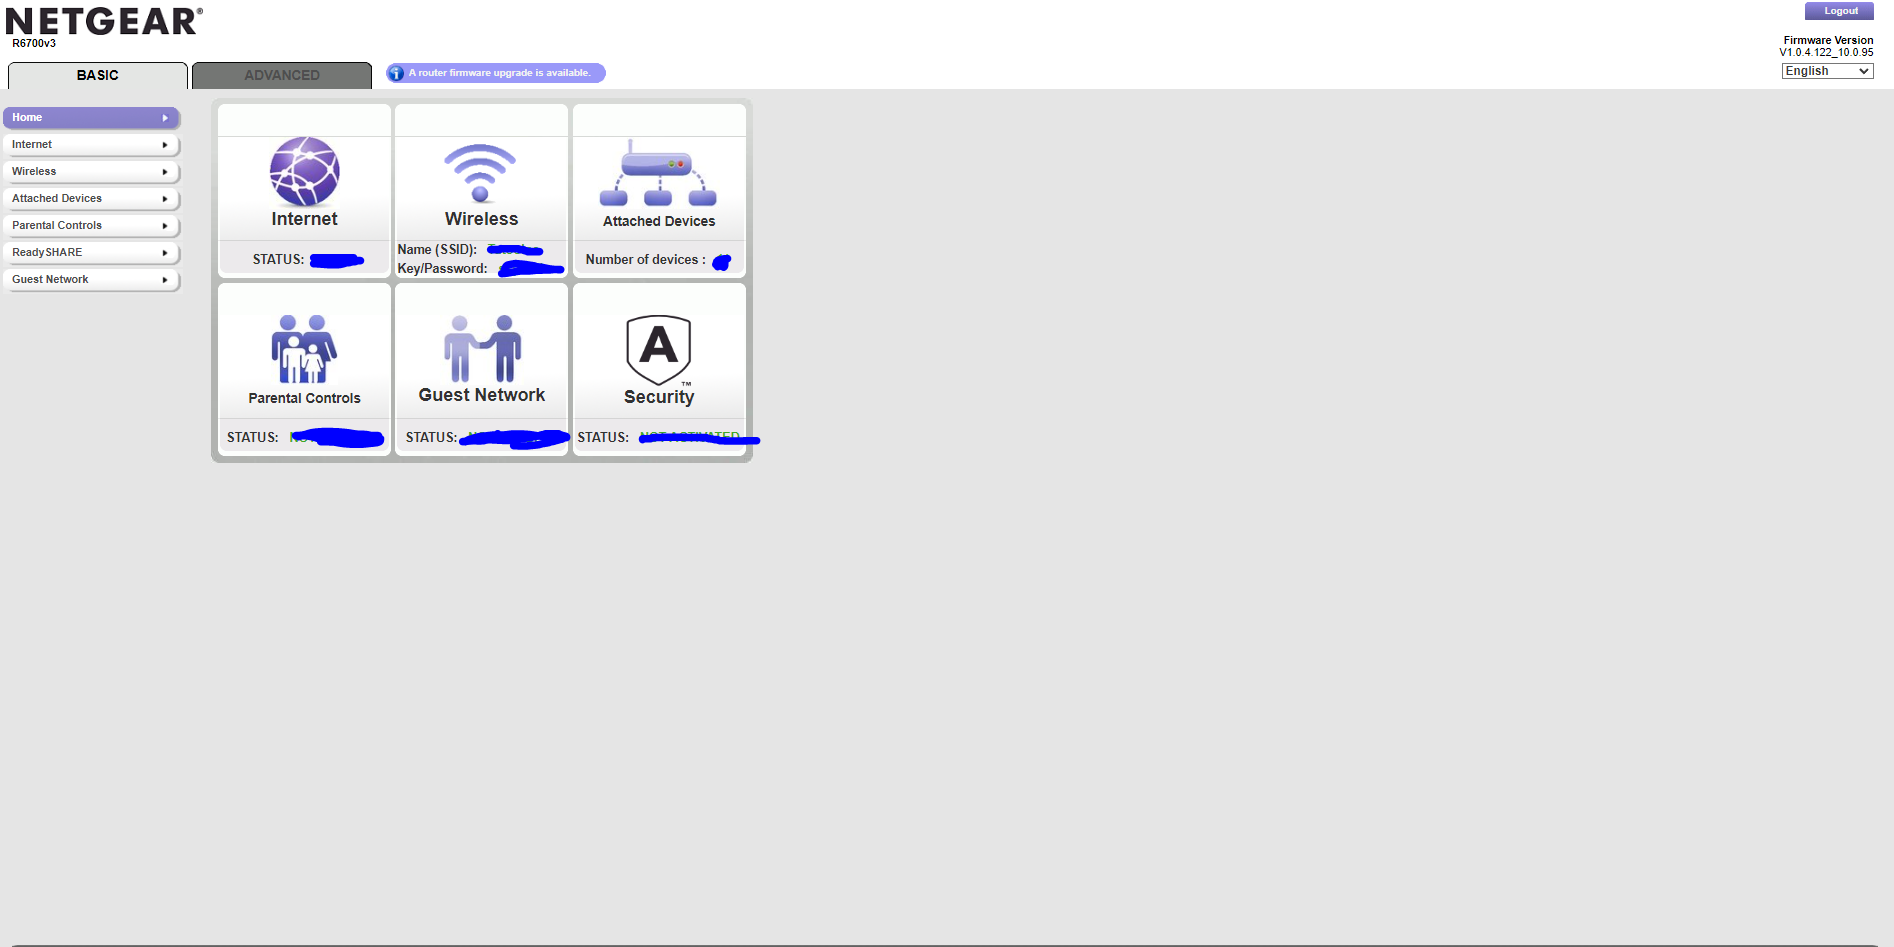
You should be met with a page like this assuming you are using a net gear router.
Step 2.
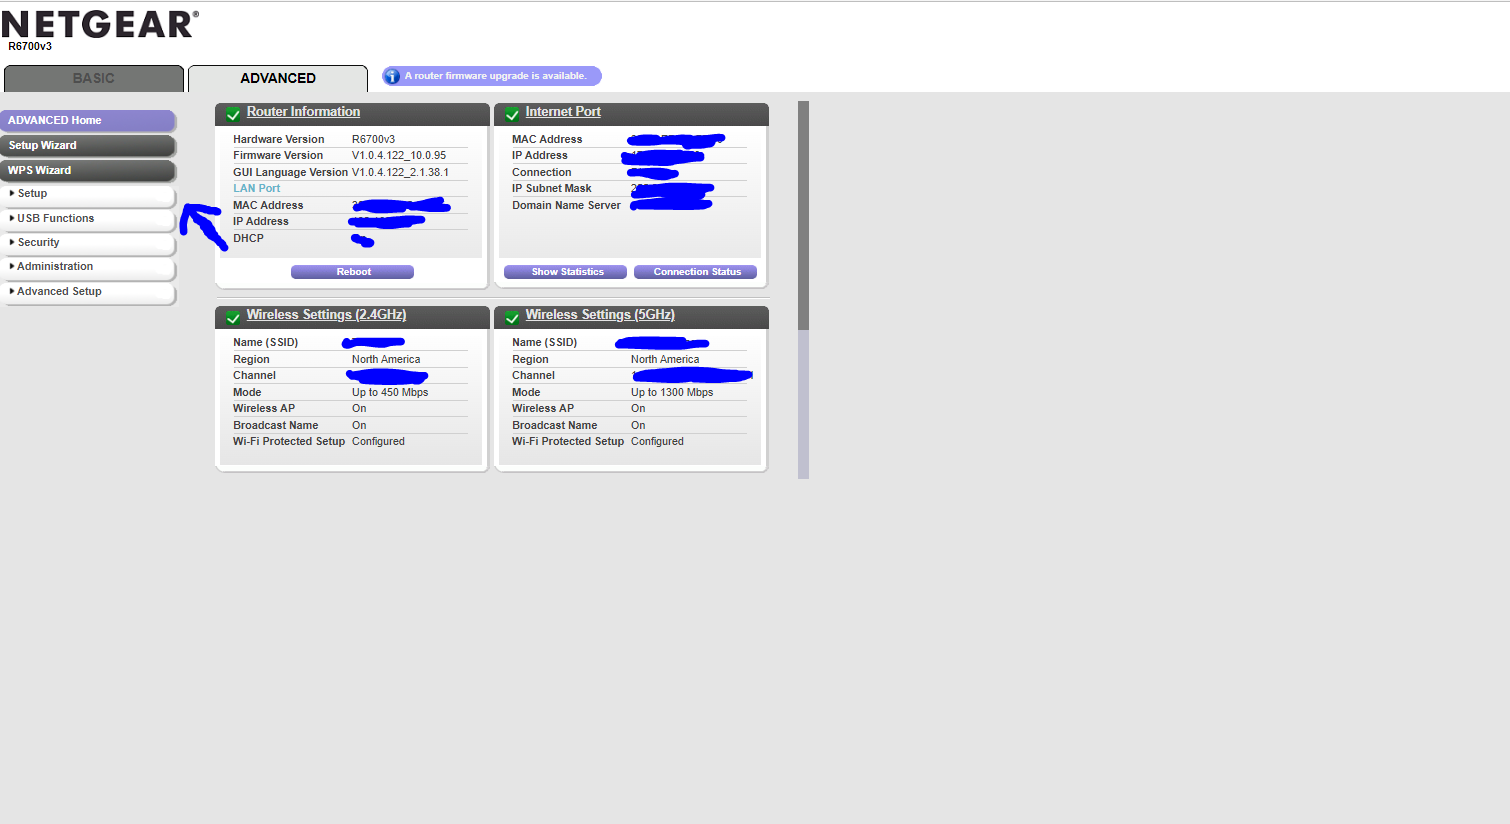
As you can see, I blocked off some information for privacy reasons obviously. You can never be too careful. From here you are going to want to click ADVANCED. Once you click advanced you should be met with the ADVANCED home page. You will see a lot of information here and buttons you can press. You are going to want to click the SET UP tab then click LAN setup it is the 4th option down.
Step 3.
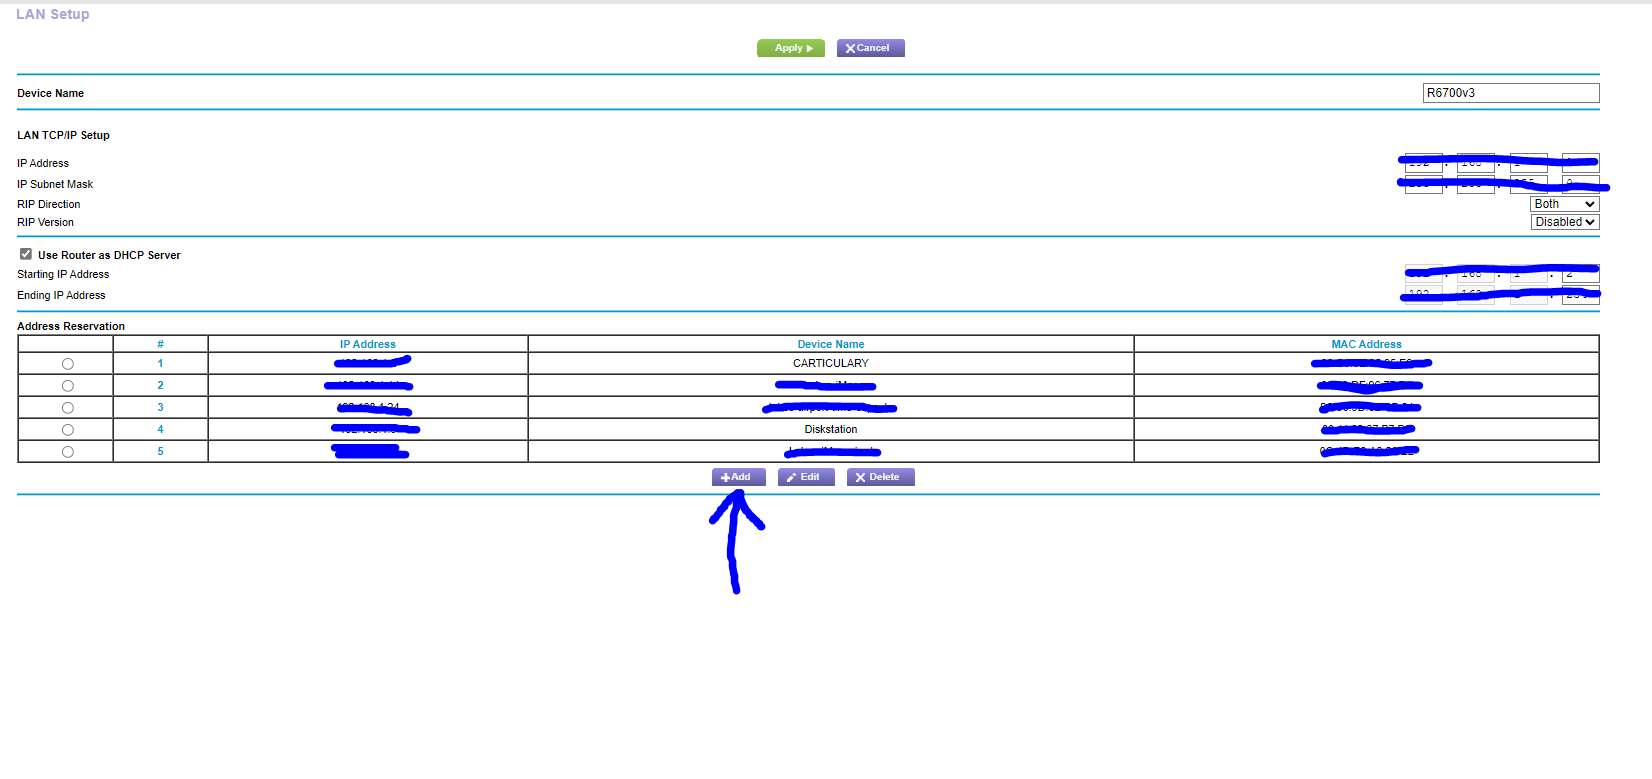
I have some reservations already configured. I do not feel comfortable showing the IP information even though it is internal because I am super paranoid. It’s okay this information is not relevant to you anyways. From here you are going to want to click ADD
Step 4.
Once you click add you will be met with the screen below. As you can see it is showing devices currently connected to the network. A smart TV, a cell phone, my laptop, etc all these items are currently getting their IPs for DHCP automatically. We will use my desktop as an example today. You can even add the information manually if you are configuring a device outside your network and bringing it in later. For this example all you are going to do is click the bubble next to the device you want to add a reservation for and then click the Green ADD button.
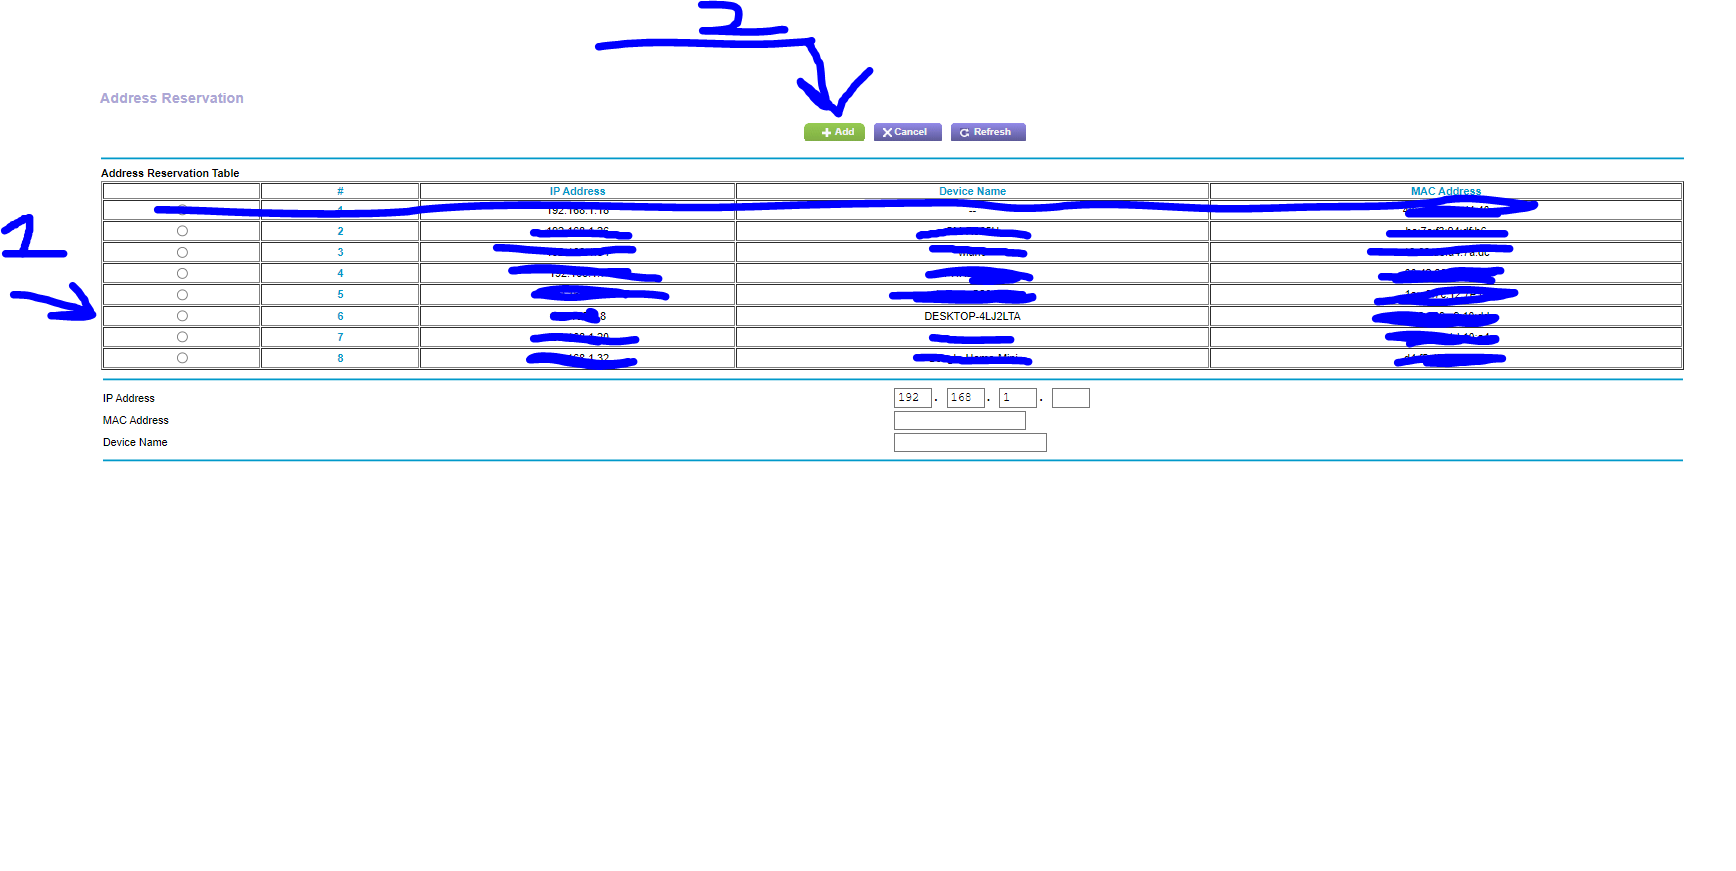
It will now take you back to the previous screen and voila! Your device should appear in the list. Not so hard right? Like I said, I will make a more comprehensive guide on DHCP and IP pools and what not in the future. I just wanted to get something out there and share some knowledge. Enterprise devices become more complex and granular, sometimes features are device specific. I hope this guide helped you and was maybe even a little entertaining. If there is anything you would like me to cover let me know. As always, stay safe and remember the motto. WORLD DOMINATION. PEACE!